When speaking about trends in interior design, the farmhouse decor is the one that comes and goes regularly in time. It brings warmth and creates a nice welcoming look to your home.
Vintage and rustic, the farmhouse style takes us to simpler times, where smart technology was not invading our everyday lives and where the bath was a luxury enjoyed with a nice book and a bunch of candles.
For those of you who want to re-design the bathroom, I'd like to share 14 amazing farmhouse bathroom trough sink ideas to pass on some inspiration. Enjoy! 🙂
1. Farmhouse Bathroom Trough Sink
Photo:Credit
I guess this bathroom design is a way woodier than some of you would do, however, I want to attract the attention to the beautiful antique beams that make a great sink base for this small farmhouse bathroom sink by Kohler.
2. Cast Iron Farmhouse Trough Sink
I love this chic mid-sized farmhouse brick floor bathroom idea with a cast iron farmhouse sink bathroom vanity. The room is very bright and cozy thanks to the big window and the beige wall colors.
3. Contemporary Farmhouse Bathroom
Photo:Credit
Take a look at this modern double-faucet farmhouse bathroom sink combined with white ceramic tiles, black mosaic tile floor, and lots of greenery.
What caught my eyes at first place was the symmetrical balance achieved through the hanging lamps.
4. Reclaimed Beam Trough Sink
Photo:Credit
This beautiful farmhouse bathroom is made by Jennifer Worts Design Inc.
It features an upcycled timber fitted with a white trough and two exquisite goose neck faucets tucked under a wood beveled mirror lining a shiplap wall. That's truly a piece of art, isn't it?
5. DIY Farmhouse Concrete Trough Sink
Believe it or not, this large concrete trough bathroom sink is 100% handmade! It takes you to a past époque in the Scandinavian countryside.
The concrete is an affordable, easy-to-use material. Plus, you can create something unique that shows your own taste and style.
6. Chunky Wood Farmhouse Bathroom Sink Vanity
Photo:Credit
Here is an inspiration for a spacious farmhouse brick floor bathroom refurbishment with a massive medium tone wood countertop, beautiful ceramic double-faucet farmhouse sink for a bathroom, and some storage bamboo knitting baskets.
I love the warmth and neutrality of this barn space.
7. Old Meets New Bathroom
Photo:Credit
This cute wood rustic bathroom nicely combines the contemporary with the vintage.
It is also very practical – with lots of storage space and the ceramic double-faucet bathroom farmhouse sink so you can share the bathroom with your significant ones.
8. Green and Brown Bathroom With Farmhouse Vanity And Sink
Photo:Credit
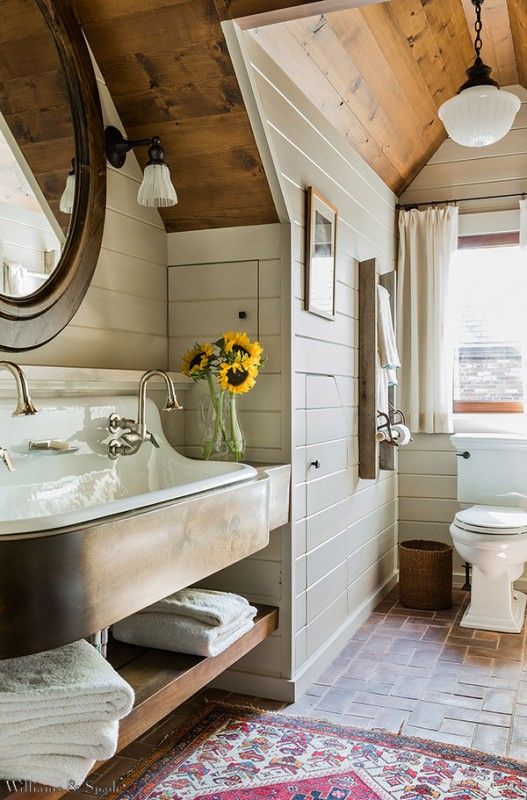
This unpretentious farmhouse bathroom, made by Williams & Spade, uses an alluring wood-and-mint green color scheme, supported by some industrial lighting and a colorful rustic carpet.
But the true focus here is the double-faucet farmhouse style bathroom sink, with appropriately retro wall-mounted hardware.
9. Farmhouse Bathroom With Modern Hardware
Photo:Credit
The vessel bathroom farmhouse sink with contemporary faucets, the white wall tones, and the afflicted wood touches add to the farmhouse feel, without seeming too rustic.
10. Mediterranean Bathroom Decor
This astonishing bathroom design in the typical
Spanish style, with wooden accents and Mediterranean mosaic tile brown floor bathroom, features a deep-drawn stone farmhouse double trough bathroom sink with beautiful vintage faucets that finish off the look.
11. Double Vanity Trough Sinks
Photo:Credit
This stylish double vanity trough sink farmhouse bathroom is very bright and welcoming thanks to the radiant tones that reflect the sunlight coming from the large window.
I love the delicate symmetry implemented in this design.
12. Very Rustic-Looking Farmhouse Sink Bathroom
When I first saw this bathroom, I thought about my great grandmother's farmhouse.
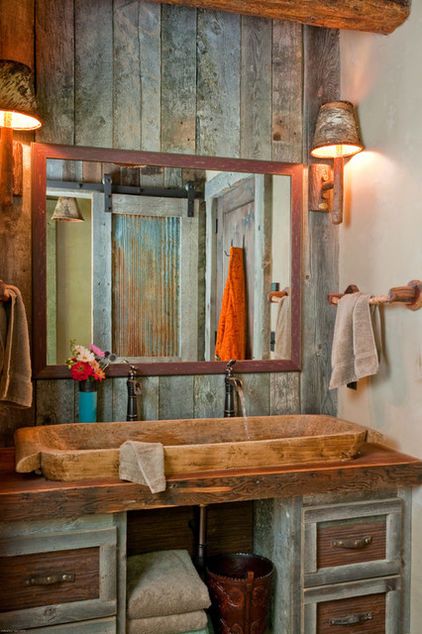
And thanks to today's old-looking, but modern-performing hardware, toilets, tubes, and trough sinks, you can get the look and feel of a farmhouse bathroom with all the present-day practicalities. This one is also suitable for country bathroom designed area.
13. Dark Wood Vanity With Trough Sink
Photo:Credit
En-suite farmhouse style bathroom adorned in checkered floor tiles boasts a large upcycled wood vanity mirror holding zinc sconces over a black granite countertop accomplished with a trough sink and double polished nickel vintage gooseneck faucets.
Arranged upon a redeemed wood washstand tailor-made with nickel towel bars and a shelf with identical wire storage baskets.
14. Greystone Farmhouse Bathroom
Photo:Credit
You would be able to add some dramatic look to your farmhouse bathroom using darker tones. Also, if you want to make the space unique, leaving your own style, try to implement some repurposed elements. The faucets here, for instance, are taken from a school science lab.
I hope you truly enjoyed my 14 amazing farmhouse bathroom trough sink ideas! 🙂
Guide to Buying Heated Towel Rails For Your Bathroom
Whether you're completely modernising your existing bathroom, renovating the bathroom in a property you've just moved in to, or simply giving your bathroom a freshen up, combine form and function when you choose to install a heated towel rail in your bathroom.
For the very best value for money with just one item doing two jobs, a heated towel rail is theperfect way to heat your bathroom and warm your towels, all whilst creating a stunning focal point that merges effortlessly with your design tastes and preferences.
So if you're thinking of purchasing a heated towel rail for your bathroom, discover our guide below to find out which heated towel rail is right for you and your home...
Commonly asked questions...
Do towel radiators heat the bathroom? Are they warm enough?
One of the most commonly asked questions when it comes to the functionality of heated towel rails is, do they actually heat up your bathroom? In short, the answer is yes! Heated towel rails are ideal for making your bathroom a warm, comfortable place to be… especially on those cold winter days!
Can I replace a radiator with a heated towel rail?
Yes. Heated towel rails plumb straight into your water system, just like a normal radiator and they warm up when your central heating is running.
Read more: How to Fit & Replace a Radiator
Heated towel rails are absolutely ideal for bathrooms which are short on space such as en suites or a downstairs toilet. You may also want to consider replacing your existing radiator with a heated towel rail, to save some extra space in your bathroom!
Which heated towel rail is right for my bathroom?
We have a number of different styles available including flat panel heated towel rails, electric heated towel rails and more which we will introduce you to below.
Flat panel heated towel rails
If you're looking for a minimalistic style of heated towel rail, we highly recommend a flat panel heated towel rail - the wide, flat panels distribute heat evenly and look seriously smart in your bathroom. Brought to you in a number of different size requirements, you'll be sure to find one to suit your space.
Shop flat panel towel rails at Plumbworld
Electric heated towel rails...
Did you know that as well as those heated towel rails that are powered by your central heating, you can buy heated towel rails that are fully electric?Electric towel rails are a brilliant option for the times when it is difficult (or impossible) to connect your towel rail to the central heating system in your home.
If this is the case in your property, you can still enjoy heated towels and a warm bathroom all thanks to an electric heated rail.
Electric towel radiators not only look stylish, but also perform fantastically too. No more damp towels to be seen here! This electric towel radiator is pre-fitted for electrical installation only. This is especially great if you have nowhere to plumb your heated towel rail into the central heating system. Brought to you in an eye-catching chrome finish, you won't be able to stop staring at it!
Shop Electric Towel Rails at Plumbworld
Read more: How to Keep a Bathroom Warm in Winter
Anthracite heated towel rails
Love the look of an anthracite heated towel rail? Here at Plumbworld we have a fantastic selection of anthracite heated towel rails that will make your bathroom stand out and hit the wow factor.
Long gone are the days where you could only choose between white or chrome towel rails! Oh yes, our anthracite collection is available in a number of sizes to fit your exact specifications.
What's more, you can also choose matching anthracite valves for your heated towel rail! Valves are a piece of essential kit to ensure your radiator works as they determine the flow of water and regulate the temperature. Valves are sold separately because their shape and size depends on factors such as the type of pipes and the available space you have in your bathroom.
Shop Anthracite Heated Towel Rails at Plumbworld
Ollie Lyon
Ollie is a self-trained DIY expert who particularly enjoys kitchen and bathroom renovations. In his spare time, Ollie enjoys cycling and hiking.
We love seeing your bathroom makeovers and sharing them on ourInstagram page - if you've had a Plumbworld renovation, tag us in your photos to be featured!
We would love to know, so why not share your favourite designs on social media with us?
Find us at:
Facebook |Twitter |Instagram
Alternatively, sign-up to our newsletter for the latest offers, newest product launches and advice.
Are you planning a new bathroom or kitchen makeover? Shop online withPlumbworld for guaranteed lowest prices and next day delivery.
Don't forget to check out the rest of ourblog for more bathroom and kitchen advice.
Most of the time, many homeowners ignore their bathroom ceilings. The ceiling offers great potential and helps customize the lavatory area. That's the reason I collect impressive bathroom ceiling ideas for you.
This design guide aims to urge you doing a bathroom update. Moreover, it turns your dream bathing space into reality. From exposed beams to a tray ceiling, you must want one. So, let's scroll down to find inspiration.
1. Rustic Bathroom Ceiling Ideas
The ceiling is covered in reclaimed wood planks. They carry nature-inspired texture and timeless grandeur to the space.
Three iron ceiling-lights compliment the ceiling and illuminate the room when night falls. What a rustic sanctuary!
2. Small Bathroom with Vaulted Ceiling
Do you have a small space? It's no problem. Build a vaulted ceiling to make your bathroom appear larger than it is.
Clad the ceiling in pure white grooved wood planks for a stylish look. Use weathered wood beams and vintage metal chandeliers to adorn the ceiling.
3. Skylight in Bathroom
Who doesn't love this bathroom? It is welcoming and magnificent, thanks to Cathedral ceiling. In seconds, it opens up the area.
The skylights keep the space sunny and allow you to gaze at the stars from your bathtub. High gloss finish wooden beams evoke an air of opulence.
4. Beadboard Bathroom Ceiling
This bathroom boasts a beadboard ceiling. It gives the space a refined coastal look. The narrow planks of beadboard introduce rustic charm.
Downlight and square flush mount ceiling light cast a bright glow. White walls instantly refresh the room.
5. Bathroom Ceiling Paint
Here, the ceiling is painted medium Yale blue. Does it not only make a bold statement but also draw the eye upward.
White crown molding, walls, and sanitary ware generate a clean environment. Blue and white French country curtain spice up the space.
6. Bathroom Ceiling Cladding Wood
The long slim gray subway tiles on the walls convey a sense of sophistication. Window walls allow the bathroom to bask in the sunlight.
Wooden ceiling cladding renders coziness to the space. Its telltale groove creates visual interest.
7. Bathroom Light Fixtures
The soft neutrals come together in this bathroom. They emanate a serene ambiance and lead to a Zen-inspired space.
White-painted ceiling keeps the area from feeling moody. The recessed lights in the ceiling brighten the whole room.
8. Small Bathroom Ceiling Designs
When it comes to decorating a small bathroom, you won't go wrong with white color scheme. It intangibly expands the space.
The smooth surface of ceiling projects modern design. LED accent light and recessed lights provide optimum illumination.
9. Black Bathroom Ceiling
This bathing space is nothing but cool. The tops of the walls and ceiling are coated in black paint. They trick the eye into seeing a taller ceiling.
Additionally, black ceiling brings instant drama to the scene. Meanwhile, cylinder flush mount lights and saber wall sconces generate a well-lit room.
10. White Painted Bathroom Ceiling Ideas
Are you crazy about beach style? Try this idea. The white wood plank ceiling exhibits a seaside ambiance.
Muted sage green walls contrast softly with the ceiling. Starfish ornaments up the cottage vibe.
11. Dimmable Bathroom Lights
Slim taupe subway tiled-ceiling and wall define the claw-foot tub area. The glass enclosure demonstrates an open setting.
The rest of the ceiling is painted gray. LED accent light and dimmable downlights create a soothing atmosphere.
12. Unusual Bathroom Lights
The light gray ceiling is a subdued contrast to white walls. Many pot lights in the ceiling resemble the star-studded sky.
Gray and white mosaic tiles take the bathroom from plain to polished one. Wooden open shelves display gray towels.
13. Modern False Ceiling Design for Bathroom
This bathroom is so breathtaking, thanks to modern false ceiling. It makes a grand statement and creates the illusion of more space.
The downlights and LED ceiling lights cast an atmospheric glow. Bathtub brings a touch of interest to the area.
14. Bathroom down Ceiling Designs
As you can see, the bathroom features slanted and drop ceilings. The homeowner painted them white for a crisp, airy look.
Crystal flush mount light and downlights maintain a dazzling room. Plant and flowers add splashes of color to the otherwise neutral scheme.
15. Recessed Coved Bathroom Ceiling
This bathing space is extravagant. Look at the crystal chandelier. It renders superior illumination and luxury.
The recessed coved ceiling lends the room the old-world Victorian charm. Accent light and pot lights set a warm ambiance.
16. Coffered Bathroom Ceiling Lighting Ideas
Beige walls convey a feeling of tranquility. The upholstered chaise lounge, shag rug, wood floor, and velvet throw blanket cozy up the space.
Metal-coffered ceiling elevates the bathroom design. A drum pendant light adorns the area.
17. Tray Bathroom Ceilings
There are two cream floral-patterned tray ceilings in this bathroom. Along with the walls, they promote an intimate setting.
White crown molding is a lovely contrast to the ceilings. Built-in oval bathtub, framed artwork, and base molding carve a royal feel.
18. Creative Bathroom Ceiling Ideas
The pillar, classic wall sconces, and geometric floor tiles preserve a lavish bathroom. Corner tub optimizes the small space.
Curved and recessed ceilings scream elegance. Flowers and leafless tree decor titivate the scheme.
19. Black Bathroom Ceiling Light
The black ceiling gives the bathroom a dramatic effect. Meanwhile, LED downlights look like blinking stars in the night sky.
Window walls allow for a mesmerizing city skyline view. I won't mind spending my lazy evenings in this space.
20. Bathroom Ceiling Trim
White base molding, ceiling, and trim contrast with gray walls divinely. Black furniture units stand out from the rest of the room.
Two fixed pendant lights light the bathroom. Burlap window blinds and wooden jug warm up the space.
21. White Glossy Bathroom Ceiling
The white ceiling has a high gloss finish. It creates a glamorous air, while pot lights keep the space from being dim.
Beige and wood walls deliver a homey ambiance to the room. A corner shower saves space on the floor.
22. Bathroom Ceiling Ideas Cheap
This bathroom employs corner tub and shower. Wood cabinets balance out the coolness of gray and metal elements.
A white coat of paint on the ceiling makes the space feel airy. The light fixtures provide even brightness.
I hope my bathroom ceiling ideas motivate you to embark on the home improvement journey. You can either hire an expert or do the installation yourself. The choice is in your hands.
Looking into a bathroom renovation but unsure about how much it would cost in the UK? Let us help you breakdown the cost of bathroom renovations and share some tips on how to plan your dream bathroom transformation.
After your kitchen, a bathroom renovation is likely to be the most expensive home makeover project. However, there are many practical benefits to investing in a bathroom renovation. For example, a new and modern bathroom adds considerable value to your property and is a worthwhile investment. But how much does a bathroom renovation cost in the UK?
On average, a full bathroom renovation cost in the UK is around £7000, but this can vary greatly. A DIY bathroom renovation on a budget is going to cost a lot less, possibly as low as £1000. On the other end of the scale, if you ordered a full high-end bathroom renovation from a professional contractor, it could end up costing as much £15,000.
In this article we will breakdown the cost of each individual bathroom item and provide tips on where to save the most cash. For in-depth breakdown of how much you should expect to pay on a new bathroom check out our article on the average cost of a new bathroom and how much you should be expected to spend on a new bathroom in 2022
Bathroom cost breakdown
Including Tips
This Bathroom Cost Guide is going to help you compile an estimation for a typical bathroom renovation in the UK. You will only be able to determine the exact cost of your bathroom renovation after comparing quotes and prices for the fittings, tiles, and labour. We'll offer some budget bathroom renovation tips, along with practical advice on how to go about renovating a bathroom.
When calculating the cost of a bathroom renovation, it helps to approach it logically. By listing the cost factors, you'll be able to assess your priorities. Putting together a spreadsheet will also help you keep track of estimated and actual costs.
You may need to compromise on some aspects of your new bathroom, to accommodate to your budget. It all depends on how flexible you are. There may be alternative solutions that you haven't yet thought of. None the less, some costs are unavoidable, and it's essential not to neglect the basics.
Here's the bathroom cost essential breakdown that you need to cover:
1. Plumbing Costs – Water supply, heating and drain pipes
2. Electrical Costs – Wiring, lighting and ventilation
3. Bathroom fittings – Fixtures like bath, taps, toilet, shower, and storage
4. Walls – Tiles, paints or the cheap tile-alternative, the wall panel
5. Labour – For preparation and installation
Bathroom Renovation Costs
Our shower panel comes in an array of colours and design choices that you can choose from to get your dream shower. We stock a range of this type of cladding, but if you can't find what you are looking for, you can use our bathroom wall panels. They aren't as thick, strong or wide, but there are more designs to choose from.
The cost of your bathroom renovation depends on these factors
1.The size of your bathroom
Large-sized bathrooms provide more space. However, you'll need more fitting and fixtures to fill in those space, and it will require a bigger budget.
2.The structural changes that are required
Having significant structural changes such as the installation of skylights, new windows, transferring plumbing or electrical points and re-plastering walls can add considerable value to the overall cost.
3. The quality of materials and fittings used
There's a wide variety of options for bathroom fittings and choosing products with higher quality comes at a price.
4. The look you want to achieve.
Those who have a smaller budget can polish, clean and upgrade their fittings. Meanwhile, those with a bigger budget can add premium fittings and other luxurious elements.
Plumbing Installation
Prices and Labour
Whether you're able to do it yourself or need to use professionals one thing we would recommend is planning the plumbing layout for your bathroom renovation. This is an efficient and practical way of reducing your overall costs.
It's always a good idea to use the existing plumbing wherever possible. Moving the toilet, for example, can escalate your bathroom renovation cost more than you might think. Removing a current water supply and drain pipes requires skilled labour and means breaking into a lot of walls and even floors. The same can be said for showers, basins, and baths.
There is no set price regarding the plumbing requirements for a bathroom renovation. It depends entirely on the amount of piping that needs to be installed and the labour requirements. Steel or copper pipe prices in the UK range from about £2.60 for the cheapest copper pipe, up to £6.70 for expensive galvanised pipes. Plastic tubes are popular, these days, as they are by far the most affordable option and uPVC doesn't rot regardless of chemicals. If there are significant alterations to the existing plumbing layout, the cost for plumbing services can mount from £700 to £900.
Electrical costs
rewiring and diagnostics
The price for electrical wiring alterations can be kept to a minimum, depending mostly on the fixtures that you choose. A luxury bath or shower can require additional electrical wiring if they use a pump.
Here is a quick list of factors worth considering when calculating the electricity cost for a bathroom renovation:
Lighting
Ventilation Fans
Power Outlets
Bathroom Circuits
Bathroom Fittings and Fixtures
Leave till last
How much does a bath cost?
The cheapest bath can cost as little as £80. Though these will be lightweight acrylic baths, with no reinforcing, a standard acrylic bath will require a frame which will need tiling or some form of waterproof cladding, so this cost needs to be taken into account. High-end, freestanding acrylic baths are strong and durable. These cost anything from £250 to over £1500.
An economy steel bath is probably the best value for money. They are of a reasonable quality standard and can cost as little as £120. If you have the budget for the ultimate in luxury baths, cast iron and stone baths will be the most expensive. Typical bath installation can take 3 to 4 hours.
Bath Cost Summary:
Low-end: £80
Top-end: £250 – £1,500
Average: £250 – £700
Typical Job Time: 3-5 hours
How much does a shower cost?
The cheapest option would be an electric shower, and this can be as little as £50. These showerheads only require a cold water supply, as the water is then heated at the shower unit. They need an electric connection but it uses very little power. It will save on electricity costs over time, though the cheapest electric showers are not always that effective at heating the water properly. Shower prices on average can vary between the different shower types.
Combination bath and shower mixers are also a cheap option and don't require a shower enclosure. These range from about £50 and upwards.
A standard shower mixer will cost you around £60 for a basic unit. A Thermostatic shower mixer adjusts the water temperature when the water pressure changes and these cost from £125.
Luxury showers come in various forms. A power shower uses a booster pump to increase the water pressure and will cost upwards of £150. Digital showers have settings for water pulsing, along with various jets and sprays. These will cost £250 or more.
You will also need to consider the cost of the shower enclosure. These usually come in kits that include the shower tray, frame and door. An economy quadrant tray and a frameless door can cost as little as £60, with full wet room kits exceeding £500. Fixing shower into your walls can take 1 to 2 hours.
Shower Cost Summary:
Low-end: £50
Top-end: £500 – £2,000
Average: £60 – £500
Typical Job Time: 1-2 hours
How much does a bathroom basin cost?
Depending on the style you're going for, you can choose between pedestal, semi-pedestal, or vanity unit basins. The budget option would be a ceramic pedestal basin, with prices starting at around £50. For a little more, a basic semi-pedestal (wall-hung) bowl can be a cost-effective solution, the cheapest of which is about £60.
Vanity units are the most elegant, and most expensive. Apart from the cost of building the actual group, the basin is going to cost you £90 or more. Standard ceramic bowls will always be the cheapest. The more elite metal, glass, or stone basins can end up costing over £300, and installation can take around 1 to 2 hours.
Bathroom Basin Cost Summary:
Low-end: £50
Top-end: £300
Average: £150
Typical Job Time: 1-2 hours
How Much does a toilet cost?
If you're considering a standard floor-mounted toilet, you'll only be paying about £50. If you'd prefer a more elegant design, expect to pay up to £500. Usually, the installation of a toilet takes 2 to 3 hours.
Toilet Cost Summary:
Low-end: £50
Top-end: £500
Average: £275
Typical Job Time: 2-3 hours
How much do taps cost?
You have three basic options for bathroom taps. You also need to take into account the type of basin or bath that you choose. Some sinks and tubs will require wall-mounted faucets, whereas many countertop basins will need a tap that's mounted to the counter. A freestanding bath, far from a wall, will need floor-mounted taps. You can usually get the job done within 2 hours with skilled workers can do it quicker.
Pillar taps are separate units (one cold and one hot) and are the cheapest, from £30 for a set. Mixer taps come in two variations.
The more expensive and albeit more convenient option is the Monobloc mixer. These taps have a single handle that you lift to open and swivel to either side for water temperature control. Monobloc mixers cost from £50 to a little over £100. Cheaper water mixers (from about £45) have separate controls for hot and cold water.
Tap Cost Summary:
Low-end: £30
Top-end: £50 – £100
Average: £40 – £65
Typical Job Time: 1-2 hours
Bathroom Walls
Tiling and other Cladding Alternative
How much does it cost to tile a bathroom?
Bathroom tiles or wall cladding make a considerable difference to the look and practicality of a bathroom. When estimating the cost of tiling your bathroom, you also need to factor in the value of the tile adhesive, grouting, and the ply underneath floor tiles.
Budget floor tiles (including adhesive, grouting, and ply) should cost about £25 per square meter. For mid-range floor tiles, you'll be paying about double this, while top-end tiles can cost up to £65 per square meter. Installation takes 1 to 5 days, depending on the coverage required.
Tile Cost Summary:
Low-end: £25 per square meter
Top-end: £65 per square meter
Average: £45 per square meter
Typical Job Time: 1-5 days
Wall tiles are usually a little cheaper than floor tiles, but there is a much less expensive option which is Vinyl flooring. uPVC wall panels are rapidly becoming the wall cladding of choice for bathroom renovations in the UK. Not only are they cheaper to buy, but they are also much easier to install. It reduces your building cost and saves a lot of time. It's the most cost-effective solution and is very elegant. These waterproof wall panels are available at Easypanels for as low as £9.50 (250mm x 2600mm). So, it's an excellent cladding solution if you're working on a budget and the installation can be done within 1 to 3 days.
Wall Panel Cost Summary:
Low-end: £14/ square meter
Top-end: £20/ square meter
Average: £17/ square meter
Typical Job Time: 1-3 hours
What are the labour costs for a bathroom renovation?
Most plumbers will complete a bathroom renovation in about two to three days. It will depend on the size of your bathroom and the amount of work required. Our labour estimator for a bathroom renovation won't be the same throughout the UK. On average, one can expect to pay around £350 per day for labour. For an average-sized bathroom, you should budget approximately £1000 for the actual plumbing.
Planning Your Bathroom Renovation
How should you order the work for your bathroom renovation? Let's set out some steps and procedures to follow. It's essential to know what exactly you're getting yourself in for, especially if you're planning your first DIY bathroom renovation. A professional bathroom renovation team will work according to a well laid out schedule to maximise efficiency and reduce the disruption to your home. Even if you use a contractor, you may be able to save some money on the initial preparation by doing it yourself.
Step 1: Initial Preparation
Remove all personal effects from the bathroom. Turn the main water supply off and drain the central heating system. Lay down floor protection for all areas leading to the bathroom and remove all bathroom fixtures. Ensure that all redundant electric wiring and pipes are removed, tiles are stripped and the walls repaired and prepared for new cladding.
Step 2: Plumbing and wiring
Walls will need to be chased for the installation of new pipes and electrical wiring. Holes in the floor and walls are drilled where required. Electric wiring and pipes need to be installed according to council regulations.
Step 3: Building and Preparation
Any structural changes need to accommodate the bath, vanity counters or basins, the toilet, and shower enclosure required to be completed. The walls need to be plastered and prepared for tiling. All fixtures also need to be secured to the floor or walls.
Step 4: Tiling
Before tiling, all surfaces need to be cleaned, leaving no trace of loose grit. Wooden floors need a waterproof floor ply. Depending on the weather, tiling will typically take about two days. The tile adhesive needs to set, before grouting. Alternative wall cladding, like PVC wall panels, should only take a couple of hours to install.
Step 5: Finishing and Cleaning
Wall-mounted taps, towel rails and shelves can only be installed after the wall cladding has been fitted and cleaned. After that, all remaining cleaning can be done. Cleaning grout residue can take some time.
As you can see, there is a lot of planning that goes into a bathroom renovation. Doing your homework will make a big difference, both in the bathroom renovation cost, and how smoothly the project runs. Shopping around for good deals and requesting several quotes from plumbers is advisable, though plumbers with proper references can put your mind at ease, even if they aren't the cheapest. So it's not entirely about the cost, you need to know that you're spending your money wisely.
Staying On top of your Bathroom renovation
Quick Project Management Tips
How much does it cost to tile a bathroom?
Good project management is the key to a successful bathroom renovation. It can be a tricky interior to get right, you need both style and functionality so there is a lot of behind the scenes planning and maintenance.
With any renovation there can also be unexpected additions and adjustments to make that effect your budget. So, it's important to plan ahead for these situations and monitor the renovation process. Here are 4 quick project management tips to help you on your way:
If you have a cartridge faucet installed in your kitchen sink, the chances are that it's a Moen kitchen faucet. Moen, after all, is the biggest name in the industry when it comes to cartridge faucets. The removal and installation of nearly all sorts of Moen kitchen faucets are similar and relatively easy. If you want to remove one, or even install a fresh piece in its place, you don't need to call in a plumber.
In this guide, we'll learn how to remove Moen kitchen faucet that has a single handle. What you should know before starting the project is the model number and type of Moen kitchen faucet that you are removing so that you can get the correct replacement part for the faulty one. It's best if you find a replacement part since then you'll just be replacing the part that's faulty instead of the entire faucet. If you can't get hold of a replacement part, you'll need to replace the whole unit.
Want to repair your faucet? Jump to possible Repairs.
What you'll need
Removal of a Moen kitchen faucet is rather simple, and you won't be needing many supplies at all. Just a couple of tools are required to complete the project. Here's a list:
Screwdriver
Needle nose pliers
Wrench
Steps to follow to remove a Moen kitchen faucet
If you have a leaky Moen kitchen faucet with pullout spray, the chances are that it's the sprayer hose that's causing the leak. In such a situation, the leakage can cause water to collect under the sink. Let's learn all about Moen single handle kitchen faucet with pullout spray repair.
Whatever the problem might be that needs fixing, the first step that you'll need to take is to remove the Moen kitchen faucet. By removing it, you'll have clear access to the internal parts that require a repair.
Here are the steps that you need to follow:
Step 1: Turn off water
Locate the water supply under the sink and turn it off. If there are separate supplies for hot and cold, turn both of them off.
Step 2: Drain the pipes
Open the Moen faucet to drain out any water that may still be inside the pipes. The water pipes around the Moen faucet must be empty before you begin disassembling it.
Step 3: Remove the handle
Use a screwdriver to take apart the handle of the faucet. Once the handle is loose, you'll find a set screw connected to it. Use a wrench to loosen this screw and then pull out the handle.
Step 4: Remove the dome and plastic sleeve
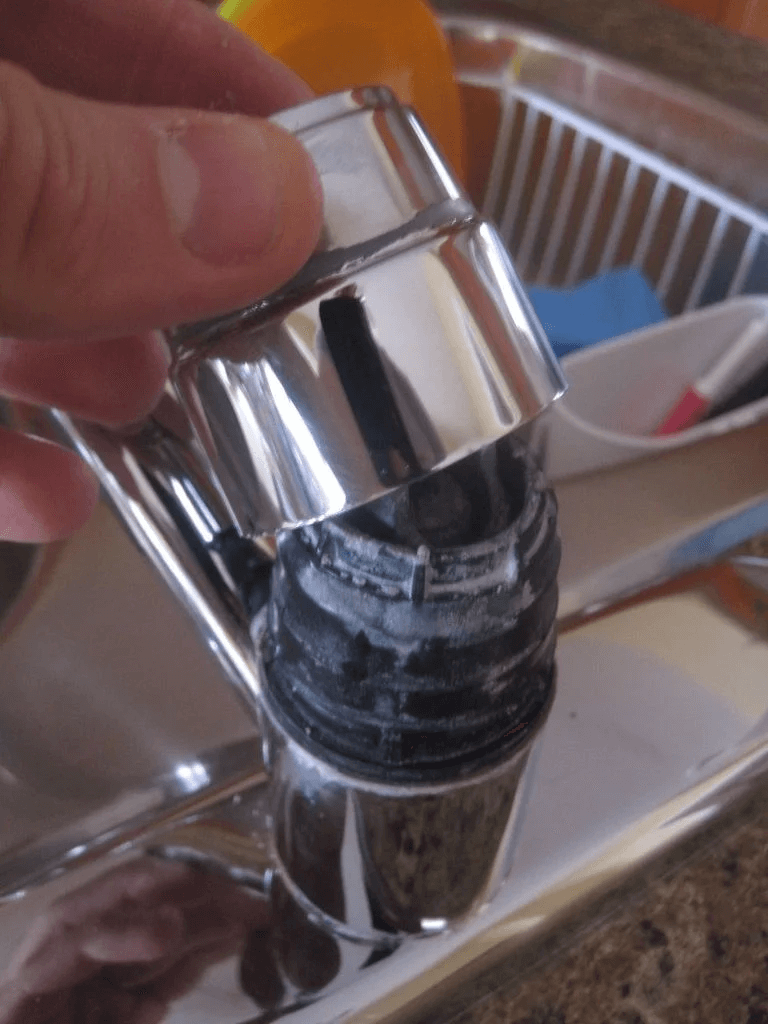
Once the handle is out of the way, you'll see a dome. It will slide out easily. Next, you'll find a black jacket that needs to be turned anti-clockwise using a wrench to be removed.
Step 5: Removing the handle mechanism
What lies below the black sleeve that you removed in the previous step is the handle mechanism that controls the water flow out of the faucet. A screw holds this mechanism together. Unscrew it using a screwdriver, and the entire arrangement will come out with it.
Step 6: Remove the ring and washer
Under the handle mechanism, you'll find a white ring that comes off easily. Just remember the direction is points in so that you can fix it back correctly when you install the faucet back after the repair. Next, there will be a washer that will need to be removed using a wrench.
Step 7: Remove the spout
Once you have removed all the rings and washers that come in the way (remember their directions and their sequence), you will see the water spout. The spout will slide off without any tool. After removing the spout, you'll see a clip holding the cartridge. the clip can be removed with a screwdriver.
Step 8: Pull out the cartridge
The old cartridge may be removed by holding the stem with pliers and twisting it in different directions until it comes off. You may need a cartridge puller for this step if pliers don't work.
So, you have learned how to remove Moen kitchen faucet. Let's see how to repair it.
Possible Moen Kitchen Faucet Repairs
Once the cartridge is out, check it's condition. If there are cracks on it, you will need to replace it. If there's just scaling, you can reuse the old one after leaving it in a vinegar solution overnight. Take out the cartridge from vinegar in the morning, and you'll see that all the scaling is gone now.
If you decide to reuse the same cartridge, do remember to replace all the O-rings on the base of your faucet with new ones. The old ones can be removed with the help of a screwdriver. These O-rings are available from stores in packages, which will also include gaskets and lubricating liquid. Lubricate the new O-rings once you have fixed them in their correct places at the base of the faucet. It's better to replace all the old gaskets with fresh ones as well.
If, after you have made these replacements and fixed the faucet back together, you still find the same leak, the problem may be in the valve seat. Purchase a new one from the hardware store and follow the same steps to take apart the faulty kitchen faucet. Using a seat wrench, remove the old valve seat and replace it with a new one. Doing so should fix the problem.
Disassemble the Faucet:
If the cartridge does not seal the water in the spout, leaks often occur. The leak could now be caused by worn seals or a completely ruined cartridge. You need to disassemble the faucet to access the cartridge.
To relieve the water pressure, first, turn off the water supply under the sink and open the kitchen tap. Pay attention to the screw cap on the faucet handle. Once this is done, you will need a screwdriver to remove the screw cap.
The screw that holds the handle is hidden under the lid, which bears a Moen logo. It's time to use a key to loosen the screw and pull the handle. This is easy, but if the handle does not peel off, beat the tie with a hammer to loosen it.
The cartridge holding nut should be removed with locking pliers. To loosen the cartridge, you need to use the screwdriver. After that, you need to remove the cartridge while still hanging on the valve stem.
Because cassettes are often enclosed in older fixtures, you may need to use a cartridge remover to complete the task.
O-rings, Gaskets, and O-rings:
After removal, check the cartridge for notches or cracks. You will need to replace the cartridge if such damage is detected. If the cartridge had a collection of dandruff, you should soak it in vinegar overnight to clean it. Replace the O-rings and seals in the valve seats.
These can be removed by inserting a loop into the valve. Since O-rings and flutes are model-specific, they are included in the kits.
If The Leakage Persists Replace The Valve Seats:
If the leak persists, it may be necessary to replace the valve seats because they are notched or worn. After removing the faucet, remove the valve seats with a wrench.
Leakage At the Base:
If your kitchen Moen faucet leaves the handle, there is a good chance that the O rings near the base have been damaged. We remove the handle from the tap and remove the spout. Replace the O rings after adequate lubrication.
Clean the outer body of the valve as well as its inner orifice. For very experienced and qualified professional plumbers, repairing a Moen kitchen faucet is not a big deal, especially if you are using the services of a reputable company.
You will be immediately spared from the hassle of a leaking kitchen faucet using the most modern sanitary instruments and procedures. Before dropping off the faucet sends you over the abyss, call a professional plumber.
Removing and Cleaning the Cartridge:
Turn off the water supply valves before removing the cartridge. Valves should be stored under the kitchen sink in a cabinet. Remove all detergents and stored items from the sink cabinet so that the valves are easily accessible.
Turn off the valve buttons by turning them clockwise. Make sure there is no water in the pipes by opening the faucet. To remove the nut from the handle, detach it with an Allen wrench. To preserve the cartridge, U-shaped clips can be used, depending on the model of the faucet.
Remove the clip to the eye with needle clips if your model has one. It is held in place with a retaining nut if it does not have a retention kit. You can use an adjustable small wrench to loosen and remove the nut.
Other Faucet Repair:
Tap water splashes occasionally instead of flowing directly, with jets of water gushing in all directions. When this happens, something is likely to get caught in the aviator's network.
Unscrew the aerator to remove it. You may need to start with a key, but once it is loose, you can unscrew it by hand.
Clean the aviator in another sink or soda in the solution of vinegar and water. Return to the original position and tighten it with the key after cleaning.
Tips for Repairing a Faucet
If you wanted to perform a Moen kitchen faucet repair, make sure that the cartridge O-ring is still in good condition. It is placed at the base of the cartridge and can be worn or broken over time, allowing water to escape from the base of the faucet.
Replace the ring or entire cartridge if it looks worn or if your faucet around the base leaks. This tutorial is for a one-handed faucet. If the Moen has two handles, you need to do it for both.
The cost of replacement cartridges is covered by a lifetime warranty on many Moen kitchen faucets.
Moen Kitchen Faucet Parts Diagram
Here is a detailed moen kitchen faucet parts diagram with their part names:
Spout Nut & Retaining Kit:
This is a special part of the faucet that delivers water from the body to the sink. It is spot resistance stainless.
Aerator:
An aerator is impossible to access without any special tool. Mostly aerator is male, which means it contains threads.
Handle Cap Kit:
A handle cap is a decorative cap or a bracket on the faucet that helps to maintain the water pressure.
Retaining Kit & O-Ring:
There is more than one o-ring in a faucet. These are used to prevent water leakage around the spout. To change an o-ring is a very easy task.
Spray Head & Hose:
The water comes out from the spray head passing through a nozzle. The spray makes it easier to clean the objects and sink. Whereas a spray hose is used to easily remove the water and also to divert the water spray.
Lever Handle and Handle Screw:
The Lever handle and handle screw is used to stop the continuous water flowing from the faucet. It is also helpful to control the temperature and pressure of water.
Diverter:
The diverter is used to redirect the water in the faucet from the faucet spout to the faucet sprayer head. It is usually located in the back of the faucet.
Cartridge and Cartridge Nut:
Cartridge in a faucet is a device that helps to control the flow of the water. If there is water leakage you must check the faucet cartridge first.
Gasket Kit:
Every faucet must contain rubber gaskets that help to seal the faucet tightly. It holds back the water and other parts.
Hose Guide:
The hose guide is a simple and inexpensive technique to pull out faucet hoses or pull down from hoses and other items under the sink. It's simple to set up. The item is delivered fully built.
Hardware Package:
Faucet hardware refers to the many components of a faucet, ranging from handles, nuts, and O-rings to spout kits, washers, and retaining clips. When your faucet breaks, the source of the problem can be anywhere.
Fix it back!
Remember all the steps you followed to remove your Moen kitchen faucet? Now follow them in reverse order, taking care to set everything in the right direction and the correct order. Doing so should fix everything back up, and the leaky kitchen faucet will be repaired!
Conclusion
It may seem a little hard at first, but once you've learned how to remove Moen kitchen faucet and completed the project on your own, it will be worth it! A leak-free kitchen faucet without paying a plumber is what you get in return for a little hard work. Isn't it worth the trouble? You may want to have a look on latest and top rated models from Moen? Have a look on our ultimate guide about moen faucet reviews.